
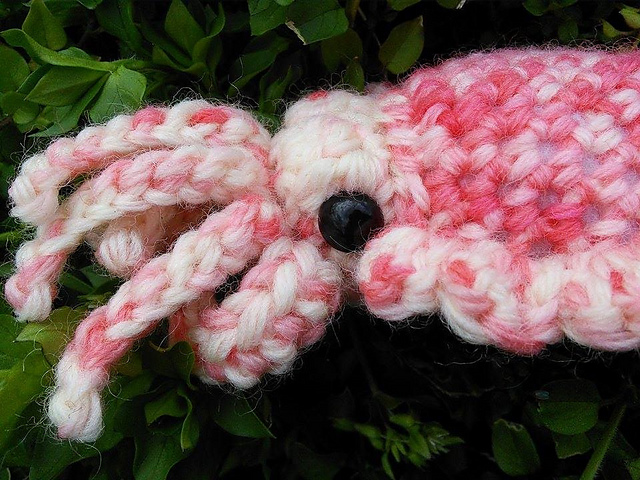
This beauty is made from yarn I dyed with
Easter Egg dye and food coloring.
The pattern was written by a great, generous crafter over at a website called Wyld Scallyns. Unfortunately, that site is no longer working, and I Love My Cuttlefish.
Using my faulty memory, a Spanish bunny pattern, and a lot of luck, I have tried my best to reproduce the original look of Mr. Wyckoff's crocheted cuttlefish.
Please note: This pattern is not meant to be exact. I hope that my imitation is seen as the sincerest form of thanks and flattery to Mr. Wyckoff and his designing talent.
Cuttlefish
Supplies
- 50 yards worsted weight yarn (approximately) in desired color
- G-hook (4.0mm)
- Fiberfill/polyfill
- 10mm safety eyes
- Yarn needle
- Bobbing along on the bottom of the beautiful briny sea (optional)

Instructions
Stitches and terms used:
Inc = increase
Dec = decrease (sc2tog) I recommend the invisible decrease from Planet June.
Bauble = 2dctog in one stitch
F (Feeler) = Sl st in FLO of base stitch, ch 11, turn and sl st 4, sc 3, hdc 3 back.
T (Tentacle) = Sl st in FLO of base stitch, ch 11, turn and sl st 10 back.
2inc = one increase in each of the next two stitches (for a total of 4 stitches)
Body
Start with either a magic circle of 4 OR ch 2, sc 4 in first ch.
Round 1: Inc x 4 (8)
Round 2: (Sc 2, 2inc) x 2 (12)
Round 3: Sc around (12)
Round 4: (Sc 4, 2inc) x 2 (16)
Rounds 5-6: Sc around (16)
Round 7: (Sc 6, 2inc) x 2 (20)
Rounds 8-10: Sc around (20)
Round 11: Sc 9, 2inc, Sc 8, 2inc (24) Adjusting stitch shift.
Rounds 12-14: Sc around (24)
Round 15: (Sc 10, dec) x 2 (22)
Round 16: Sc around (22)
Round 17: Sc 10, dec, Sc 9, dec (20) Adjusting stitch shift.
Round 18: Dec x 5 (10)
Slip stitch to next, but do not cut your yarn.
Tada! The basic body shape has now become clear! Now, it may or may not be obvious, but when you were increasing along the way, they were bunched on either side, to help make a flattened shape.
You should have finished with your hook on one side of the flattened body.
Edge Ruffle:
Turn the flattened body and slip stitch down the sides of the body, as if outlining it.
Tip: Keep your stitches loose, as you'll be cramming 3 stitches into them on the next row.
When you get to the tail, you can ch 1 to help you get over the starting round/magic ring.
Continue slip stitching up the opposite side of the flattened body until you reach the other 'shoulder'.
Ch 1 and turn.
(Dc 3 in first st, sc in next) and repeat until you've gone all the way around.
Tip: If desired, Dc 5 in same stitch at tip of tail for a 'fan' look.
Sl st to finish off and cut yarn. You will use the tail from the head to sew the pieces together, so secure this end as desired (I usually stuff it inside the body).
Head
Start with either a magic circle of 5 OR ch 2, Sc 5 in first ch.
Round 1: Inc x 5 (10)
Round 2: (Sc, inc) x 5 (15)
Round 3: Sc 4, F, (T x 6), F, Sc 3 (15, 7 sc, 2 feelers, 6 tentacles)

Tip: Use a stitch marker with the first stitch of this row, to ensure accuracy.
Round 4: Sc around, using the 8 free back loops behind the tentacles. (15)
Tip: Count after this row; for some reason I always end up adding a stitch somewhere behind the tentacles.
Round 5: Sc 5, (bauble x 2), Sc 3, (bauble x 2), Sc 3 (15, 11 sc, 4 bauble)
Round 6: (Sc, dec) x 5 (10)
Sl st and cut yarn leaving a long enough tail to sew pieces together.
Place safety eyes as desired. I like mine on the outside of both bauble stitches, but some like them between the bauble stitches.
Stuff both head and body as desired, then sew together.
You're done! Congratulations!
The original pattern by Steven Wyckoff on Wyld Scallyns was free, as is this pattern. Please do not try to sell this pattern as your own, as it does a disservice to the original creator. Thank you!
Psst, just found this a few minutes ago :-)
ReplyDeletehttp://littlelimpet.blogspot.com.au/2016/09/free-cuttlefish-crochet-pattern.html
You are my new favorite person! A million thanks! (I've already printed it out; never again! I love this pattern!)
DeleteGlad we 'connected' and you found your pattern again. It looks so sweet, and I so love the colour of yours. Must make one soon :-)
DeleteHehe, I'm glad I could be of assistance! Your cuttlefish looks so good with the variegated colour! Have you ever done a post on how to dye it yourself? I'd love it give it a go.
DeleteI honestly can't thank you enough! I've done two cuttlefish with the variegated colors, but both times the dyeing process didn't go as smoothly as it could have.
DeleteI do have an Instructable about basic yarn dyeing with Kool-Aid: http://www.instructables.com/id/Dyeing-Yarn-in-a-Microwave-Using-Kool-Aid/
The yarn for the cuttlefish was done by rolling the yarn into a ball first, instead of wrapping it into a huge loop. I think the reason I didn't get good color on the inside layers was because I wrapped the ball too tightly.
If I ever manage to work out a good method of "ombre" dyeing, I'll post about it! :D
Hola desde España. Estoy haciendo esta sepia tan bonita , pero al hacer el head , no entiendo la vuelta 3 y la 5 , me podrían aclarar por favor estas dos vueltas? , No entiendo la F lo que quiere decir y chucherías tampoco.. Gracias
ReplyDelete