Tuesday, June 30, 2015

Starfleet's Newest Ensign!

I'm coming up on the end of my first month in the JJA (June/July/August) 2015 Tour of Duty for the Starfleet Fiber Arts Corps (SFAC).

This tour, I got to play for real fake points as an ensign!  I was reassigned from the Zimmermann to the Noro:

The doors of a distant cabin hiss open quietly, and a former cadet steps out, her new ensign pip shining on the collar of her uniform. She adjusts the shoulder strap of her carrying case as she strides confidently to the turbolift. Her steps falter, however, once she gets inside.
“Transporter Ro--no, Main Engineering,” she says quickly. The ‘lift doors shut silently, and then part again a few decks later, just as quickly.
Ensign Velvet Key hesitates near the Zimmermann’s main engineering console, and then pauses to wipe an imaginary speck of dust off of one panel. She looks around, a little misty-eyed, until her Away Mission automaton project wanders over to her.
She crouches, gives the little ‘bot a proud look, and then stands again. “You’ll be in good hands,” the ensigns says softly. “Make me proud by helping the next chief engineer.”
With that, she goes to the turbolift once more. “Transporter Room 6,” Ensign Velvet Key says distinctly, straightening.
“Where to, Ensign?” the transporter room chief asks as she enters the room and climbs up onto the pad.
“One to beam aboard the U.S.S. Noro,” the ensign replies.
And then in the Noro's forum thread:

The on-duty transporter chief acknowledges a hail from the U.S.S. Zimmermann, still in space dock over San Francisco. Moments later, a single beam of glittering light coalesces and a young ensign steps off of the transporter pad.
“Uhm…Cad--I mean, Ensign Velvet Key reporting as ordered,” she tells the chief, gripping the strap of her standard-issue Starfleet case.
Welcome aboard,” the chief says, handing her a PADD. “Report to Captain Samyra, First Officer Jrnylst, or Second Officer Jenybecca for assignment.”
“Yes, sir” she says crisply with a salute. “Thank you, sir.” The new ensign pauses for a moment in the doorway to get her bearings, and then heads for the turbolift.
Ensign VelvetKey reporting for duty, fellow shipmates. I look forward to serving with you all this tour.

I'm also helping out in Ten Forward this tour, as assistant barkeep!  I serve pictures of yummy food and drinks to the crewmembers that come in, and once in awhile prompt the forum thread with questions to keep chat going.

This month, we've been dealing with the Department of Temporal Investigations, and each of the six available missions have been themed around them.

Command:  Craft something to indicate how you would have handled this situation by either Option A crafting exactly to pattern to indicate you would do the same, or Option B modifying a pattern to show you would do things differently. Justify your position.

In undertaking this assignment, I chose to study a distant cousin of the tribble (the merphyllis munkai), as we had previously assumed tribbles to be extinct up until Commander Sisko’s little brush with time travel. While I was able to recreate the little animal’s proportions to exact specifications, it is unfortunate that his instructions had a few minor errors that needed correcting in order to provide a well-balanced appearance.
For that is what I believe the true issue is: balance. While I disagree with a few of the minor decisions Sisko and his team made (such as bringing tribbles back to our time), the overarching premise of his intent remains: he was correcting the actions of another time traveler. In fact, he was in the unique position of being one of the few people who knew about the problem and sought to fix it.
In conclusion, if I were to undertake the same mission, I would try to eliminate incidental alterations to the timeline as much as possible. No, I do not need to speak with Captain Kirk in order to obtain signature. (But that does not say anything about photobomb selfies made with the tricorder…)
Tallou the Monkey pattern; this guy is for sale!
...I just haven't put him on Etsy yet.


 Diplomatic:  Determine whether Kirk’s behavior was a violation of the Temporal Prime Directive. Craft something red for yes, or something green for no.

Commodore, in my review of the case files of this particular incident, as well as based upon multiple references to Captain James T. Kirk’s psychological evaluations and his own mission logs, it is my belief that Captain Kirk was a formidable judge of character. Thus, when he decided to tell the truth he knew beyond a shadow of a doubt that he would not be believed, and therefore was not breaking any manner of rule or regulation.
I have crafted a charming, leafy vine of decoration to illustrate my point. Thank you!
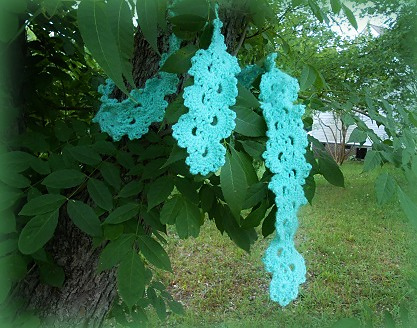
 A scarf for Ms. Pat, DH's manager.
Queen Anne's Lace pattern is free on Ravelry!


Engineering:  Invent a “temporal stability field” which cancels out any instabilities in the timeline and prevents tampering.

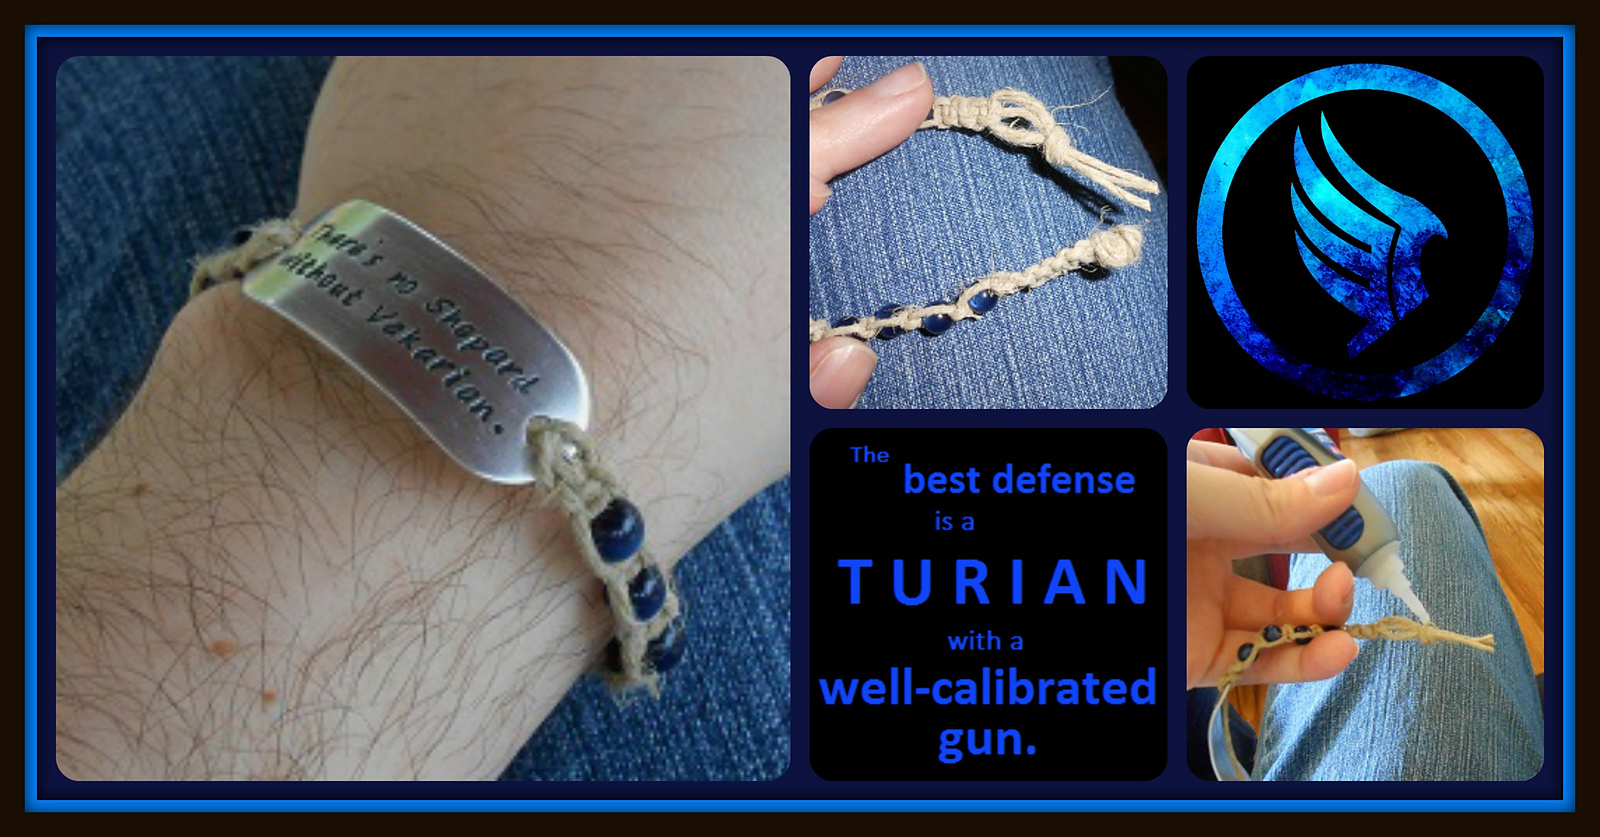
In my own study of engineering, I have developed a four-point temporal stability field with quadruple the strength of a normal forcefield. These chaos-inspired inhibitors may be placed around the anomaly to keep it from affecting our timeline. Sometimes the best way to fight temporal chaos is with equal amounts of meta-chaos.
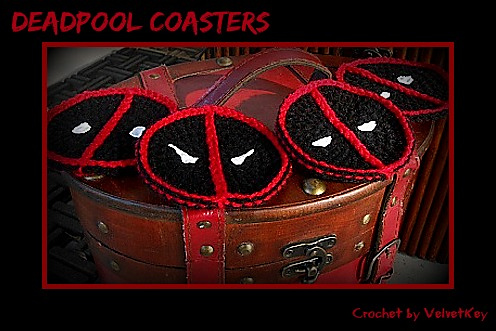
 This pattern is free right here on my blog!


Medical:  Craft something to protect against the temporal distortions.

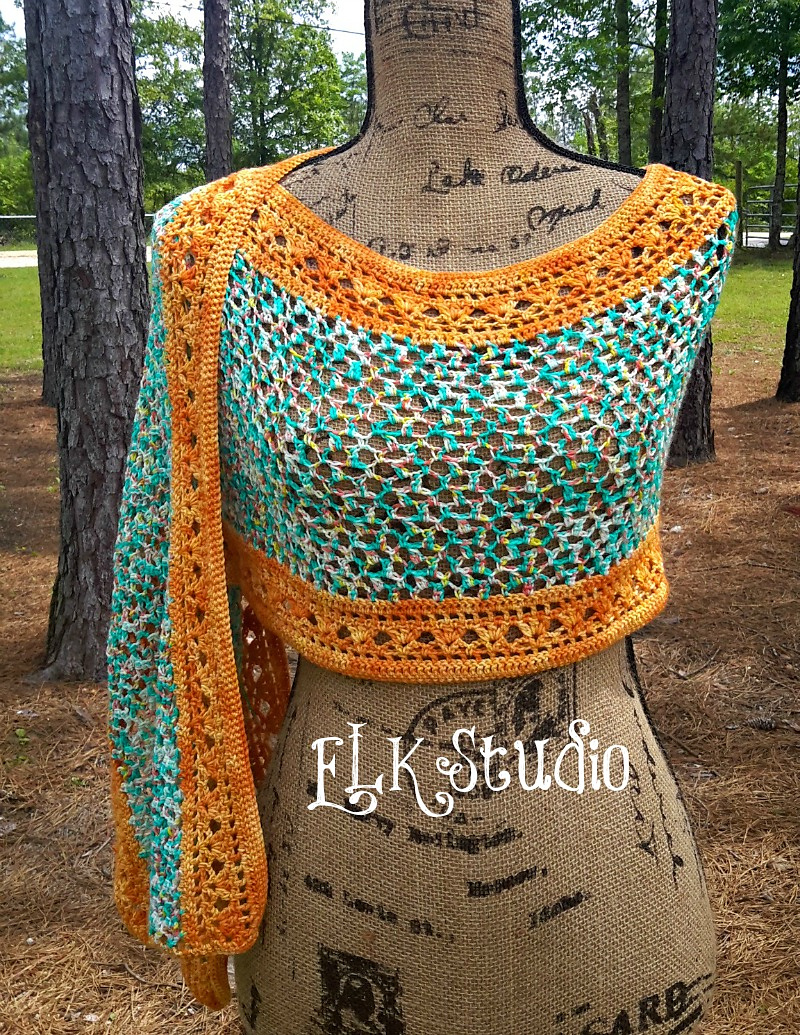
Part of maintaining one’s health during temporal instability is maintaining sanity. However, recorded logs and other manner of records are not normally immune to shifting timelines. I have crafted a violet forcefield that can be placed around a recording device (such as a book, tricorder, or data PADD) in order to preserve useful information that would assist repeat time travelers in reaching their goals more efficiently.

 I may have spilled soda on this journal and needed
to cover up the damage, so I improvised...


Science:  Craft a hat to hide Vulcan ears, Andorian antennae, or just a bad hair day.

A close-fitting cap is the best way to hide Vulcan ears; on windy planets the hat will not get caught and blown away, thus exposing the secret identity of said Vulcan. To that end, I have crafted a beanie-style hat, complete with decorative pins.
 Pattern is free on Ravelry.


Tactical:  Craft something that represents Gary Seven’s role in the Temporal Cold War – something in a single color to indicate his honesty, something in more than one color to indicate his duplicity.

In my very brief (one might say non-existent) study of the mission reports pertaining to the individual known as Gary 7, I have come to the conclusion that one should not ‘monkey’ around with any time travel, timelines, time vortexes, or even undertake that manner of responsibility.
I have expressed my thoughts on Gary 7’s duplicitous actions with this peculiar little stuffie:
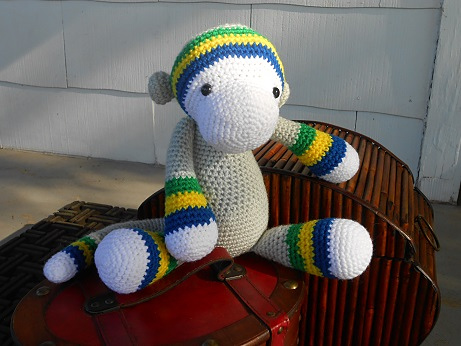
I made this one for my cousin's little boy.

Brig:  Any project that was started before the target month.

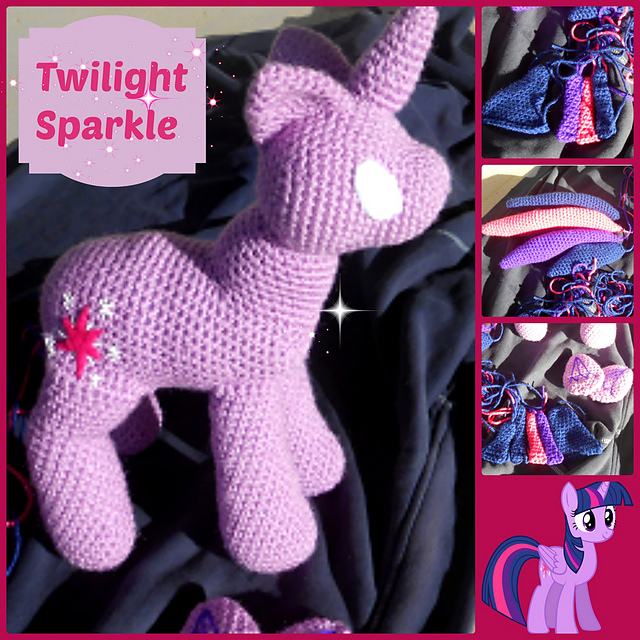
This engineering project is the second in my attempts to build a small automaton army to assist me with maintaining the systems in Engineering. I regret that I had to confine this particular model to the Brig for so long; a power surge in the ship activated him before his software had completely downloaded. Rather than lose hours of precious work, I confined him to the Brig while I waited for the necessary computations to finish. Now I have completed all necessary programming and he is just as useful and non-threatening as the first one.

A former commission, now cancelled.  
If you want to buy him, let me know!


Temporal Training Center:  Rescue temporally stranded projects and turn UFOs into FOs.

I proposed my unfinished King Pause plushie:

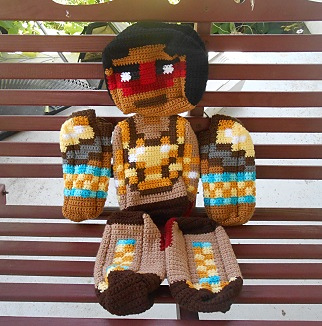
Hopefully I'll get him all finished by the end of July!
He's also a cancelled commission, so 
he'll be available for purchase eventually.

So far, this tour has been very interesting!  I can't wait to see what happens next month!

Craft on!

Thursday, June 25, 2015

Deadpool Coasters Pattern

I bet you guys had no idea that I like to make gifts for people instead of buying them.

What's with the crickets?

Oh, you totally knew, right?

Mike the coworker's birthday was last week, and as a guy, he can be notoriously difficult to craft for.  He's a gamer/comic book/expensive nerd, and I do not have any kind of background in comics or related topics whatsoever.  Even the Panda/DH isn't as big of comic geek as Mike the coworker.

But.

We went over for a dinner and game night at the beginning of the month, and we took a deck-building game called Legendary with us.  The Panda and I have played together a couple of times, but never with four people.

Quick background on Legendary: it's a card game based on the Marvel comic universe, comprised of many little mini-decks that you mix together to create unique games every time.  So you select your superhero team (in this case, we had Iron Man, Black Widow, Hawkeye, Deadpool, and a fifth person...maybe Nick Fury?) and shuffle their little decks together to make one large Hero Deck.

Then you also select a super-villain (such as Red Skull, Magneto, etc.) and some minion decks (Hydra minions, for example).  The minion decks are shuffled together, and then are drawn from at the beginning of each person's turn.  The super-villain sits in his own special place on the board and it's your job as a team to take him and all the minions down without letting too many of them escape.

Anyway...

I had forgotten for a split-second that Mike the coworker is a huge Deadpool fan.  When we started playing, it was clear that the only hero cards he was going to pick up were Deadpool.

Knowing next to nothing about Deadpool (except that he's apparently a very meta character who marches to the beat of no man's drum), and finding no quick and easy patterns, I thought about the simple, icon-like pictures I'd seen:

And of course, thought to myself:  "That would make a great coaster."

So without further delay: 


Deadpool Coasters

Supplies

  • 80 yards black worsted weight yarn (set of four coasters)
  • small amount of red worsted weight yarn
  • 3.75mm (F) hook
  • scissors
  • yarn needle
  • white fabric paint
  • Optional: meta-humor
Instructions

This pattern is done in joined rounds, not continuous rounds.

Begin with black yarn.

Rnd 1:  Ch 3 (counts as first hdc).  Hdc 7 in first ch.  Join to initial ch with a sl st. (8 hdc)

Note:  I like to place a stitch marker on my ch 2's, so they're easier to identify.

Rnd 2:  Ch 2 (counts as first hdc here and throughout pattern). Hdc once in same st as ch.  2 hdc in each st. Join to initial ch 2 with sl st. (16)

Rnd 3:  Ch 2, hdc in same st.  Hdc in next st.  (Inc in next, 1 hdc) 7 times.  Join with sl st. (24)

Rnd 4:  Ch 2, hdc in same.  Hdc in next 2 st.  (Inc in next,  hdc in next 2 st) 7 times.  Join with sl st. (32)

Rnd 5:  Ch 2, hdc in same.  Hdc in next 3 st.  (Inc in next, hdc in next 3 st) 7 times.  Join with sl st. (40)

Rnd 6:  Ch 2, hdc in same.  Hdc in next 4 st.  (Inc in next, hdc in next 4 st) 7 times. (48)

Do Not Join Yet.

Color change:  Pick up your red yarn, leaving an initial tail long enough to easily weave in later.  Draw a loop through your ch 2 and final hdc, completing the joining sl st with your new color.  Cut your black yarn, leaving a tail long enough to weave in.

Note:  In the picture below, the two center coasters have one type of border (sl st in FLO) where red striping is visible on the coaster sides.  The ones on either end do not (sl st through both loops).  Your choice!

Continue with red yarn.

Chain 16.  

Stretch your chain across the width of your coaster.  Sl st into the hdc on the opposite side (see note above about FLO versus both loops).

Note:  When crossing the initial st where you attached the red yarn, sl st over it as normal.

Continue to sl st loosely (otherwise the coaster will curl at the edges) in each st around. (48)

Do Not Join Yet.  We are going to do an Invisible Join.

Ready?  Watch this video from Planet June.  (Jump to 1:16 to skip to the tutorial you need.)

Planet June/June Gilbanks is awesome!
Go support her and her fabulous tutorials on her website.

After that, you're ready to weave in ends!

Use white fabric paint to do the eyes for the coasters. (Why fabric paint?  Because it washes well if beverages spill on the coasters.)

These are the eyes I painted:


And I'm sure that he has many more expressions, too!

Hope you enjoy the pattern, and of course as Deadpool is owned by Marvel/Disney, please do not sell anything made from this pattern.  (Because who wants to be on the wrong side of a Disney lawsuit?)

Craft on!

Wednesday, June 24, 2015

Tropical Delight Wrap

Backtracking a bit here...

It's totally because I was waiting for pretty pictures.

I've written previously about playing the Shadowmoor LARP, and between the months of April and May, I began to do some online role-play with another Sampan.

(The leader of the Sampan storyline had made a Facebook group to keep all the Sampan in Shadowmoor 'in the loop' about shared visions. I have been trying to spread the word around to all of the other Sampan, to make sure that they know what's going on.)

Long story short: Calla (Jamie) and Feather (me) decided to take a short sea voyage out to see said leader (the Dragon Prince) using Honu's (my husband's) boat.

Anybody confused yet?

We have had some great written roleplay interactions on our journey out to the Dragon Prince (in fact, we're still RP-ing now!) and when we were originally starting out, Calla expressed concern about being recognized and drawing unwanted trouble to ourselves.  (Feather is very much acquainted with this feeling.)

"Perhaps you would consider a disguise? I mean, you didn't think my real name was Feather, did you?" Feather summons an almost conspiratorial smile. "I used to be a weaver by trade; I'm sure I have something that would keep your identity a secret."
Calla smiles, leaning forward slightly. "I... hadn't thought about your name before, but that does make sense."
She thinks for a moment. "I've made a hood that would disguise you, or a long wrap that can be worn any number of ways. Or of course I could craft something new in a color you prefer." Clearly a little delighted with the idea of disguise hijinks, Feather rummages through one of her trunks.
"And of course, a nickname would help mask your identity, too," she continues. "Even Midori went by Jade before coming back to TaiZi Rax."
Calla smiles. "I'll leave the nickname to you. It takes me ages to name kittens, and they don't even care what they're called. I would be very grateful to borrow something. They're used to seeing me in colors analogous to blue. Anything outside that color family would throw them a bit..."
"Hmm," Feather says after a long moment of consideration. She pulls a small bag out of her trunk; the contents clack softly as she opens it and pours a handful of seashells into her palm. After a thoughtful moment, she stirs the shells with a finger before selecting four and putting the rest away. Then she pulls an open-worked wrap with tones of beige and purple, accented and bordered in seafoam green.
"Periwinkle," Feather says, holding out the shells and wrap to Calla.
Calla had laughed and nodded her agreement at Feather's assessment of Town on a ship, and watched with intrest as she sorted through the crocheted goods and shells. She now looks surprised, then smiles.

"Really? I mean- Thank you!" She bows and carefully accepts the gifts with both hands. "They are beautiful."

"You're more than welcome," Feather replies with a grin. "The adventures of Periwinkle and Feather...I think we could sell a few books with a title like that."

At the time, I sent Jamie a picture of the shells Feather had given her above:

 My mother brings me shells when she goes on vacation;
these are actually periwinkle seashells, hence Calla's nickname.

If you read the description above of the 'open-worked wrap'...it does seem oddly specific.  

I'm trying to contain my crafting glee...it's not working.

Maybe it's because I had already selected a lovely pattern that I wanted to make: 

Tropical Delight Shawl by Elk Studio
Purchase available through Ravelry.

And I had wandered out to my nearest lovely yarn store and bought the colors I wanted to use.  

Jamie/Calla/Periwinkle didn't know I was doing any of this!

So I spent the first couple weeks of May crafting like a madwoman.  I ran into a couple of pattern snags, but they were entirely my fault for not reading everything correctly.  I absolutely love the result, and staged some Hawaiian-themed pictures:


Doesn't everybody have a ukulele at home?

At the last minute, however, I wasn't able to attend the May gather for Shadowmoor (too many other crochet commissions; sometimes being a responsible adult has to come first).  So I sent the wrap up to site with Mike the Coworker (with the periwinkle shells wrapped inside).

Jamie loved it!

And what was even better, I asked if I could take pictures of Calla (meaning, in costume) to show you all, and I was finally able to do it at the June gather!

The sunlight and setting were perfect; this location is just outside the larger cabin we use for the Mages' Guild.

Isn't Calla (and the wrap of course) just lovely?
Thank you to Jamie for being so gracious!

Such a pretty color combination!

Apologies for the silence in June; I've had a lot of commissions going on and will hopefully share one or two (plus another free pattern!) soon.

Craft on!

Thursday, June 11, 2015

Minecraft Creeper Pattern

When I signed up to sit my Potions OWL (in the Harry Potter challenge), I was told to add a little something extra on to make it a 3-month project.

I decided to add a Minecraft creeper, and bonus:  I get to share my pattern with all of you!  Check this bad boy out:

Yes, that is literally his size next to my car.

This creeper stands at 21" tall, and is made to scale with my Minecraft people plushies, and the one enderman plushie:

The enderman is 44" tall, and his pattern is coming in a future post.

Minecraft Creeper

Supplies
  • 600 yards of green/green varigated (I used Hobby Lobby's I Love This Yarn: Sagey Tweed)
  • 20 yards of black yarn
  • 2.5 lbs. approx. of fiberfill
  • 4.0mm (G) hook
  • yarn needle
  • scissors
Instructions

A creeper has six body parts: four (4) feet, one (1) body, and one (1) head.  Each body part will be worked as two (2) panels.  They will then be seamed together using single crochet.

(I am going to apologize in advance for not having pictures available at this time.)

Feet (Panel 1)  Make four (4).

With green yarn, chain 13.

Row 1:  Sc in 2nd ch from hook; sc across in each st. (12 sc)

Rows 2-18: Ch 1, turn.  Sc across. (12)

Row 19:  Ch 1, turn.  Sc in BLO across (12).  (This is a faux seam.)

Rows 20-30: Ch 1, turn.  Sc across. (12)

Row 31: Ch 1, turn.  Sc in BLO across. (12)

Rows 32-48: Ch 1, turn.  Sc across. (12)

Cut yarn and knot off.


Feet (Panel 2)  Make four (4).

With green yarn, chain 13.

Row 1:  Sc in 2nd ch from hook; sc across in each st. (12 sc)

Row 2-18: Ch 1, turn.  Sc across. (12)

Row 19:  Ch 1, turn.  Sc in BLO across in first 11 sc.  

Note:  You will change color to black on stitch 12.  With green, begin the final sc by inserting hook into BLO, yarn over, pull loop through.  Take black yarn and yarn over, pull through to complete stitch 12.  The tails of your yarn should be on the side of the panel without ridged faux seams.

Cut green yarn, leaving a 1-1.5" tail.  Continue with black yarn.

Rows 20-30: Ch 1, turn.  Sc across. (12)

Row 31: Ch 1, turn.  Sc in BLO across. (12)

Rows 32-36: Ch 1, turn.  Sc across. (12)

Note: You will change color to green on the last stitch of Row 36.  With black, begin the final sc by inserting hook as normal.  Yarn over, pull loop through.  Take green yarn and yarn over, pull through to complete stitch 12.  The tails of your yarn should be on the same side of the panel as the other tails (the side without ridged faux seams).

Cut black yarn, leaving a 1-1.5" tail.  Continue with green yarn.

Rows 37-48: Ch 1, turn.  Sc across. (12)

Do not cut yarn.  Tie your color change tails together on the wrong side.

Time to seam!  Pull final loop larger and remove hook in order to practice lining up the panels.  Take one foot panel of each (Panel 1 and Panel 2) and fit them around each other to make a box.  If you're having trouble envisioning what I mean do the following:

Lay your Panel 2 horizontally, wrong side up (your tails and knots will show).

Lay your Panel 1 vertically, right side up on top of Panel 2.   (Yes, they will be a plus sign.)

The two smaller, square center portions of each panel should be on top of each other.  This is the top and bottom of the foot.  The longer portions of the panels are the sides of the foot.

Fold Panel 2's sides up and pin them to Panel 1, if desired.  Fold Panel 1's sides down and pin them to Panel 2, if desired.  Now you should have a box shape.

Place your hook back into your final loop, and crochet through both panels with single crochet.  This very long seam will close up the entire foot.

Note:  You may choose to sc an extra stitch at the corners to make them more defined.  I've done it both ways, and have no preference.

Be careful not to seam the last seam closed before stuffing the foot.  

Stuff the foot firmly (remember, the creeper has to stand on it), and finish sc'ing the last seam.  When stuffing, make sure to poke stuffing into each corner to give it a boxy shape.  Cut yarn and weave in end securely with yarn needle.


Body (Panel 1) Make one (1).

With green, chain 25.

Row 1: Sc in 2nd ch from hook; sc across in each st. (24)

Rows 2-36: Ch 1, turn.  Sc across. (24)

Row 37:  Ch 1, turn.  Sc in BLO across. (24)

Rows 38-48: Ch 1, turn.  Sc across (24).

Row 49:  Ch 1, turn.  Sc in BLO across. (24)

Rows 50-84:  Ch 1, turn.  Sc across. (24)

Cut yarn and knot off.


Body (Panel 2) Make one (1).

With green, chain 13.

Row 1:  Sc in 2nd ch from hook; sc across in each st. (12)

Rows 2-36:  Ch 1, turn.  Sc across. (12)

Row 37:  Ch 1, turn.  Sc in BLO across. (12)

Rows 38-60:  Ch 1, turn.  Sc across. (12)

Row 61:  Ch 1, turn.  Sc in BLO across. (12)

Rows 62-96: Ch 1, turn.  Sc across. (12).

Do not cut yarn.  

Time to seam again. Pull final loop larger and remove hook in order to practice lining up the panels.  Take each and fit them around each other to make a box, as described above at the end of the foot section.


Crochet through both panels with single crochet.  This very long seam will close up the entire chest.

Note:  You may choose to sc an extra stitch at the corners to make them more defined.  I've done it both ways, and have no preference.

Remember not to seam the last seam closed before stuffing the chest.  

Stuff the chest firmly (it needs to be able to support the head), and finish sc'ing the last seam.  Cut yarn and weave in end securely with yarn needle.


Head (Panel 1) Make one (1).

With green, chain 25.

Row 1:  Sc in 2nd ch from hook; sc across in each st. (24)

Rows 2-24:  Ch 1, turn. Sc across. (24)

Row 25:  Ch 1, turn.  Sc in BLO across. (24)

Rows 26-48:  Ch 1, turn.  Sc across. (24)

Row 49:  Ch 1 turn.  Sc in BLO across (24)

Rows 50-72:  Ch 1, turn.  Sc across. (24)

Cut yarn and knot off.


Head (Panel 2)  Make one (1).

With green, chain 25.

Row 1: Sc in 2nd ch from hook; sc across in each st. (24)

Rows 2-24:  Ch 1, turn.  Sc across. (24)

Row 25:  Ch 1, turn.  Sc in BLO across. (24)

Rows 26-48: Ch 1, turn.  Sc across. (24)

Row 49:  Ch 1, turn.  Sc in BLO across. (24)

Rows 50-54: Ch 1, turn.  Sc across. (24)

Now begins the face detail with black.  You will use the color change method above to change colors.  I will describe how it is done the first few times, but when CC (color change) is noted, it is always going to be the same process of finishing the final SC with the new color.

Rows 55-60:  Ch 1, turn.  Sc in first 2 st.  CC at the end of the 3rd st.

Note:  You will change color to black on stitch 3.  With green, begin the 3rd sc by inserting hook into stitch, yarn over, pull loop through.  Take black yarn and yarn over, pull through to complete stitch 3.  The tails of your yarn should be on the side of the panel without ridged faux seams.

Rows 55-60 (continued):  Continue with black for the next 5 st.  CC to green at the end of the 6th st. Continue with green for the next 5 st, CC to black at the end of the 6th st.
Continue with black for the next 5 st, CC to green at the end of the 6th st.
Continue with green for the next 3 st.  (24)

You have just done the creeper's eyes.

Rows 61-63:  Ch 1, turn.  Sc in first 8 st; CC at the end of the 9th st.
Continue with black for the next 5 st; CC to green at the end of the 6th st.
Continue with green for the next 9 st.  (24)

Rows 64-69:  Ch 1, turn. Sc in first 5 st; CC at the end of the 6th st.
Continue with black for the next 11 st; CC to green at the end of the 12th st.
Continue with green for the next 6 st. (24)

Rows 70-72:  Ch 1, turn.  Sc in first 5 st; CC at the end of the 6th st.
Continue with black for the next 2 st; CC to green at the end of the 3rd st.
Continue with green for the next 5 st; CC to black at the end of the 6th st.
Continue with black for the next 2 st; CC to green at the end of the 3rd st.
Continue with green for the next 6 st. (24)

Note:  Make sure to tie off any loose yarn ends so that the face will not unravel.

Time to seam!  Pull final loop larger and remove hook in order to line up the panels.  Take both panels and fit them around each other to make a box.

Place your hook back into your final loop, and crochet through both panels with single crochet.

Stuff the head, remembering to pack the corners well for a well-defined box shape, and finish sc'ing the last seam.  Cut yarn and weave in end securely with yarn needle.


Attaching the Limbs

Back Feet:  Arrange two feet side-by-side and sew the top front seam to the bottom rear seam of the chest.  His little black "toes" will be facing forward, almost beneath the chest.  Knot yarn and weave in ends securely.

Note:  I usually cut a 24" piece of green yarn and sew all the way across both feet, since they are side-by-side.

Front Feet:  Take the other two feet and sew the top rear seam to the bottom front seam of the chest.  Knot yarn and weave in ends securely.

If all of your black "toes" are not facing the same direction, then refer to picture below.


Head:  Stitch head to chest with yarn needle and green yarn.  I usually stitch the head to the body all the way around, so that the head won't wobble.  (This only works because the creeper has no arms to attach at the shoulder.)  Weave in all ends securely.

Ta da!

Creeper's gonna creep.

And since it must be said somewhere, I'll say it here: Microsoft is suing people selling Minecraft things online.  Don't get me in trouble.  This is a free pattern.  Utilize it properly and be responsible with it.

Thanks, fellow crafters!  'Til next time, craft on!

Wednesday, June 3, 2015

HPKCHC : May Classes (S15)

Good morning fellow badgers, eagles, snakes, and lions!

Now that I've wrapped up my first month in the Harry Potter Knitting and Crochet House Cup as a sorted student, I thought I would share the classes I turned in:

Care of Magical Creatures

The prompt:  Craft something based on thestrals or acromantulas.


Professors, in my study of thestrals this month, I came across another winged species of horse known as the alicorn. In particular, this mythical creature has made a resurgence in Muggle media, and I have a few close friends that are enamored by this particular animal.

Though they are not skeletal like thestrals, alicorns do possess wings with which to fly. They are also horse-like in appearance, but have feathered wings instead of leathery, as well as an additional protruding horn.

Still, these distant relations to thestrals were quite fascinating to study, and I’m glad I took the time to look them up in the thestral footnotes.

Thank you for your time, professors!


Charms

The prompt: Craft something reminiscent of water, or to protect from water.


Professors, our study of the aguamenti spell has caused me to recall all the wonderful trips I had made to the ocean with friends and family over the years. I’ve always been charmed by the many naturally-beautiful hues of the rolling ocean waves, and decided that my attempt at reproducing the aguamenti spell must reflect those delicious, aqueous colors.

Thus, I have developed a pattern and crafted a trio of tiny hexi vials that have captured the many-layered hues of the ocean. I hope to share my new pattern with the Hogwarts school library soon! One of these vials is for me, and another I am trading with karagenknight as fulfillment for one of her house badges! The other is for another friend I met along the NQFY course this past term.

Thank you for considering my homework, professors. What an exciting (and useful!) way to share my love of the seaside with new friends.


Defense Against the Dark Arts

The prompt:  Craft something that has a final 'hardening' or 'setting' step.


Professors, I received a charming bracelet in the mail, but I looked at the cheap Muggle band to which the focal bead was attached and knew I could use a fortify spell to turn the simple blue string into three-ply hemp. Additionally, I applied some of Mendigann’s Magical Glue to the frayed knots in order to set them into shape and harden them against continual usage. Thank you for your time!


Divination

The prompt:  Use two colors to create one object.


VelvetKey pauses hesitantly by the telescopes, clearly unsure what she should be doing. She listens carefully to the professors before daring to look through the eyepiece of the nearest telescope. After several long minutes and more than a few gasps of delight at the celestial bodies overhead, the first-year Hufflepuff student settles down to craft up a report.
Professors, for my first Divination lesson, I was fortunate enough to find the Butterfly Nebula, which was high in the sky for the time of night. Not far away, I saw a very bright formation of stars, which I later searched out using the “winter-net” (a Muggle invention, but very useful; especially for streaming episodes of Doctor Who). The formation was actually an asterism known as the Summer Triangle. The color of the nebula and the name of the asterism evoked a desire to make a summer wrap for a friend--she is a coastal sea elf, and loves cool, natural colors. I do beg for your secrecy, professors--it is a surprise gift for our meeting at the end of the month!


History of Magic

The prompt: Craft something that offers a form of protection, even if it won't last.


Professors, many strange and unusual creatures have only one specific environment in which they can survive naturally. Merpeople, for example, must have water to breathe. It made me wonder: could some of these unique alien and magical creatures survive if they had some sort of manufactured protection, such as a suit with water inside?

In my research on the Muggle “winter-net” I found a most interesting documentary, filmed right here the UK. It is called
Doctor Who, and even the Muggles seem to believe it. I do doubt some of the practical methods at work in this documentary (after all, Muggles do seem to enjoy a plethora of special effects), but in particular there is one alien race that uses suits to protect themselves in order to move through the galaxy as we do: the Daleks.

I decided to try my hand at reproducing one of these protective casings, and then if successful gift it to a friend in the Ministry of Magic’s Creature Containment division for use and study. I hope that this project meets with your approval, professors!


Muggle Studies

The prompt: Craft something based on a postage stamp (provide picture of stamp).

Good evening, professors! I was very intrigued by your class prompt and immediately went to do some research on (laughably enough) one of those Muggle “winter-net” devices. (I think that’s what they’re called.)

A very helpful incantation known as Google helped me to discover this set of vintage postage stamps:


Which I thought were very simple and lovely. I immediately set about trying to reproduce that style of tree…unfortunately, I’m only a first-year student and…well…I think I shrunk it?


Potions

The prompt: Craft something based on potion ingredients.


Professors, in reading the ingredient list for this potion, I was struck by how many potion ingredients are plant-based. In the interest of finding renewable resources for gathering these ingredients, I have discovered an adorable living sapling that willingly surrenders it’s extra leaves and stray roots for magical use. As it grows, I expect that we might yet discover many new uses for these provided resources, and look forward to the challenge. Here is the little sapling, posed with some of my other potion ingredients.


Transfiguration

The prompt: Craft something in an unusual color (for you or for that something).


Hello professors! I have long been fascinated by the recurring cycles of Muggle fashions and trends throughout their history. As a half-Muggle myself, I recalled with some laughter the tales of my wizarding father and his strange, enchanted VW van. The charm was rather harmless; it changed the outside of the van to whimsical colors and designs whenever the weather would change. My father would drive up and down the west coast, his surfboard strapped to the top of his van…searching for the perfect waves and the perfect girl. For all his Muggle eccentricities, he did meet my mother who was a native of California. She loved art, and his van was no exception. I found a similar representation of his van here:


And thought a simpler, toned down version might be ideal for this assignment. Thus, I charmed my replica to be an unexpected simple, calming blue, better to blend in with the Muggle vehicles of today, and not the days when my parents were cruising up and down the beaches, getting into all kinds of trouble.

I hope you accept my homework, professors. Thank you!


Detention


I’m joining the Hufflepuff yarn bomb here in Detention!

After finicking about with this ridiculous (and might I add next-to-super-unhelpful pattern) hat, I am pleased to show it is finished.

Of course, it’s soft nature is perfect for keeping the noggin warm in all sorts of inclement missions--I mean,weather. Additionally, I invented and added padded bands to encircle the cranium, providing extra armor in order to deflect offensive spells while out in a miss--weather. Of course I meant weather.

Additionally, I will be developing a separate beard that may or may not be able to optionally attach inside the helm for added concealment and costuming for use during missio--confound it, weather!

Ahem.

So as you can see, professors, there are quite a lot of uses for this particular item. And I am so glad it is finished!


Yes, it was a busy, busy month for classes!  Next time, I'll talk a little bit more about Puffopoly, the Hufflepuff game where turning in classes and etc. gets you moves around a Monopoly-like board.

Craft on!